Hey there! I'm a supplier of water pipe fittings, and I've seen my fair share of old, worn - out pipe fittings that need to be removed. Whether it's for a home renovation or a commercial project, knowing how to remove old water pipe fittings is a crucial skill. In this blog, I'll walk you through the process step by step.
Why Remove Old Water Pipe Fittings?
First off, you might be wondering why you need to remove those old fittings in the first place. Well, there are several reasons. Over time, pipe fittings can corrode, especially if they're made of materials like iron or some types of steel. Corrosion can lead to leaks, which not only waste water but can also cause damage to your walls, floors, and other parts of your property.
Another reason is that you might want to upgrade your plumbing system. Maybe you're switching from an old - fashioned system to a more modern one that uses Stainless Steel Water Pipe Fittings for better durability and resistance to corrosion. Or perhaps you're changing the layout of your plumbing, and you need to remove some old fittings to make way for new ones.
Tools You'll Need
Before you start removing those old water pipe fittings, you'll need to gather the right tools. Here's a list of the essentials:
- Pipe Wrench: This is a must - have tool for removing pipe fittings. It comes in different sizes, so make sure you choose one that fits the size of your pipes.
- Adjustable Wrench: An adjustable wrench can be useful for getting a grip on fittings in tight spaces where a pipe wrench might not fit.
- Hacksaw: If the fitting is really stuck and you can't remove it any other way, a hacksaw can be used to cut through the pipe. But be careful, as this should be your last resort.
- Plumber's Tape: Also known as Teflon tape, this is used to seal the threads of new fittings when you're installing them later.
- Bucket or Container: To catch any water that might spill out when you disconnect the fittings.
Step - by - Step Removal Process
Step 1: Turn Off the Water Supply
This is the most important first step. You don't want water gushing out all over the place when you start removing the fittings. Locate the main water shut - off valve for your property and turn it off. If you're working on a specific fixture, like a sink or a toilet, you can also turn off the individual shut - off valve near that fixture.
Step 2: Drain the Pipes
After turning off the water supply, open all the faucets in the area where you'll be working to drain the remaining water from the pipes. Let the water run until it stops flowing. This will help prevent water from leaking out when you start removing the fittings.
Step 3: Identify the Type of Fitting
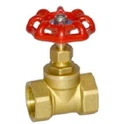
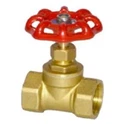
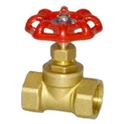
There are different types of water pipe fittings, such as threaded fittings, compression fittings, and soldered fittings. Each type requires a different removal method.
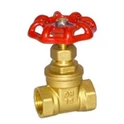
- Threaded Fittings: These are the most common type of fittings. They're attached to the pipes by screwing them on. To remove a threaded fitting, use a pipe wrench or an adjustable wrench. Place the wrench on the fitting and turn it counter - clockwise. If the fitting is really tight, you might need to use a little force, but be careful not to damage the pipe.
- Compression Fittings: Compression fittings are held in place by a nut and a ferrule. To remove a compression fitting, first, loosen the nut using a wrench. Then, slide the nut and the ferrule off the pipe. You may need to wiggle the fitting a bit to get it loose.
- Soldered Fittings: Soldered fittings are joined to the pipes by melting solder around the joint. Removing a soldered fitting is a bit more complicated. You'll need to heat the joint with a propane torch to melt the solder. Once the solder is melted, you can use a pipe wrench to twist the fitting off. Be very careful when using a torch, as it can be dangerous. Make sure you have proper ventilation and keep flammable materials away.
Step 4: Remove the Fitting
Once you've identified the type of fitting and chosen the right method, it's time to remove the fitting. Use your wrench to turn the fitting counter - clockwise until it comes loose. If the fitting is stuck, you can try applying some penetrating oil to the threads or joint and letting it sit for a few minutes. This can help loosen the fitting.
Step 5: Clean the Pipe
After removing the fitting, use a wire brush or sandpaper to clean the end of the pipe. Remove any dirt, rust, or old sealant from the pipe threads or surface. This will ensure a good seal when you install the new fitting.
Dealing with Stubborn Fittings
Sometimes, you'll come across a fitting that just won't budge. Here are some tips for dealing with stubborn fittings:
- Heat It Up: As mentioned earlier, if you're dealing with a soldered fitting, heating the joint with a torch can help melt the solder and make the fitting easier to remove. For threaded fittings, you can also try heating the fitting slightly with a heat gun. The heat will cause the metal to expand, which might loosen the fitting.
- Use a Penetrating Oil: Apply a generous amount of penetrating oil, like WD - 40, to the threads or joint of the fitting. Let it sit for at least 15 - 20 minutes to allow the oil to penetrate and loosen the rust or debris. Then, try turning the fitting again.
- Cut It Off: If all else fails, you can use a hacksaw to cut through the pipe just below the fitting. This should be your last resort, as it will require you to replace a section of the pipe as well.
Installing New Fittings
Once you've removed the old fittings and cleaned the pipes, it's time to install the new ones. Here are some tips for installing new water pipe fittings:
- Choose the Right Fitting: Make sure you choose the right type and size of fitting for your pipes. Whether you're using Stainless Steel Water Pipe Fittings or Copper Water Pipe Fitting, ensure they're compatible with your pipes.
- Apply Plumber's Tape: For threaded fittings, wrap a few layers of plumber's tape around the male threads of the fitting in a clockwise direction. This will help create a watertight seal.
- Tighten the Fitting: Use a wrench to tighten the new fitting onto the pipe. Turn it clockwise until it's snug, but don't over - tighten it, as this can damage the fitting or the pipe.
Final Checks
After installing the new fittings, turn the water supply back on and check for any leaks. Open all the faucets and let the water run for a few minutes. Inspect the fittings and the pipes for any signs of water leakage. If you notice a leak, turn off the water supply again and tighten the fitting a little more or re - apply the plumber's tape.


Contact Us for Your Water Pipe Fitting Needs
If you're in the market for high - quality water pipe fittings, look no further. As a trusted water pipe fitting supplier, we offer a wide range of products, including Stainless Steel Water Pipe Fittings and Copper Water Pipe Fitting. Whether you're a DIY enthusiast or a professional plumber, we have the right fittings for your project.
Contact us today to discuss your requirements and get a quote. We're here to help you find the perfect water pipe fittings for your needs.
References
- "The Complete Guide to Plumbing" by Home Repair University
- "Plumbing for Dummies" by Roy Barnhart