Converting a normally open duplex valve to a normally closed one can be a crucial modification in many heating and plumbing systems. As a supplier of Duplex Valve, I've encountered numerous customers who have specific requirements regarding the valve's operation mode. In this blog, I'll guide you through the process of making this conversion, highlighting the key steps, considerations, and potential challenges.
Understanding the Basics of Duplex Valves
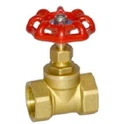
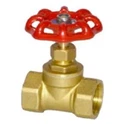
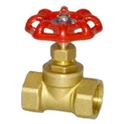
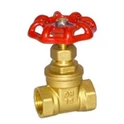
Before diving into the conversion process, it's essential to understand what a duplex valve is and how it functions. A duplex valve is a type of valve commonly used in heating systems, especially in conjunction with Manual Radiator Valve. It allows for the control of the flow of hot water or steam to a radiator or other heating device.
A normally open duplex valve means that, by default, the valve is in an open position, allowing the flow of fluid through it. On the other hand, a normally closed duplex valve is closed by default, preventing the fluid from flowing until a specific action is taken to open it. The conversion from a normally open to a normally closed valve can be necessary for various reasons, such as system design changes, safety requirements, or energy efficiency improvements.
Reasons for Converting to a Normally Closed Valve
There are several reasons why you might want to convert a normally open duplex valve to a normally closed one. One of the primary reasons is safety. In some systems, it's crucial to have the valve closed when there is no power or when the system is not in operation. This can prevent the accidental flow of hot water or steam, reducing the risk of burns or other hazards.
Another reason is energy efficiency. By having the valve closed when not needed, you can prevent the unnecessary flow of fluid through the system, reducing energy consumption and potentially lowering your utility bills. Additionally, in some cases, a normally closed valve can provide better control over the system, allowing for more precise regulation of the temperature and flow rate.
Tools and Materials Required
Before you start the conversion process, you'll need to gather the necessary tools and materials. Here's a list of what you'll typically need:
- Screwdriver set: To remove and install any screws or fasteners on the valve.
- Adjustable wrench: For loosening and tightening nuts and bolts.
- Replacement parts: Depending on the specific valve model, you may need to replace certain components, such as springs or actuators, to change the valve's operation mode.
- Sealant: To ensure a proper seal when reassembling the valve.
- Safety equipment: Gloves and safety glasses to protect yourself during the process.
Step-by-Step Conversion Process
The conversion process can vary depending on the specific valve model and manufacturer. However, the following general steps can guide you through the process:
Step 1: Turn Off the Power and Water Supply
Before you start working on the valve, it's crucial to turn off the power supply to the system and shut off the water or steam supply. This will prevent any accidental flow of fluid while you're working on the valve and reduce the risk of injury.
Step 2: Remove the Valve from the System
Using the appropriate tools, carefully remove the valve from the system. This may involve disconnecting pipes, removing mounting brackets, or unscrewing the valve from its housing. Make sure to keep track of all the parts and fasteners you remove, as you'll need to reinstall them later.
Step 3: Disassemble the Valve
Once the valve is removed from the system, carefully disassemble it. This may involve removing the valve cover, actuator, springs, and other components. Refer to the valve's manufacturer's instructions or technical documentation for specific guidance on how to disassemble the valve.
Step 4: Identify the Components to Replace
In most cases, you'll need to replace certain components to change the valve's operation mode from normally open to normally closed. This may include replacing the spring with a stronger one or changing the actuator to a model that is designed to close the valve by default. Refer to the valve's technical documentation or consult with the manufacturer to determine which components need to be replaced.
Step 5: Replace the Components
Once you've identified the components to replace, carefully install the new components. Make sure to follow the manufacturer's instructions and use the appropriate tools to ensure a proper installation. Apply a small amount of sealant to any threaded connections to prevent leaks.
Step 6: Reassemble the Valve
After replacing the components, reassemble the valve in the reverse order of disassembly. Make sure to tighten all the screws, nuts, and bolts securely, but be careful not to overtighten them, as this can damage the valve.


Step 7: Install the Valve Back into the System
Once the valve is reassembled, carefully install it back into the system. Connect the pipes, mounting brackets, and other components as required. Make sure to align the valve properly and ensure a tight seal between the valve and the pipes.
Step 8: Test the Valve
After installing the valve back into the system, turn on the water or steam supply and the power to the system. Test the valve to ensure that it is operating correctly. Check for any leaks or abnormal noises, and verify that the valve is closing and opening as expected.
Considerations and Potential Challenges
Converting a normally open duplex valve to a normally closed one can be a complex process, and there are several considerations and potential challenges to keep in mind. Here are some important points to consider:
- Compatibility: Make sure that the replacement components you choose are compatible with the specific valve model and manufacturer. Using incompatible components can result in improper operation or damage to the valve.
- Warranty: Converting the valve may void the manufacturer's warranty. Before making any modifications, check the warranty terms and conditions and consult with the manufacturer if necessary.
- Safety: Working with valves in a heating or plumbing system can be dangerous. Make sure to follow all safety procedures and wear appropriate safety equipment, such as gloves and safety glasses.
- Technical expertise: If you're not familiar with valve systems or don't have the necessary technical expertise, it's recommended to consult with a professional plumber or technician. They can provide guidance and assistance to ensure a successful conversion.
Conclusion
Converting a normally open duplex valve to a normally closed one can be a valuable modification in many heating and plumbing systems. By following the steps outlined in this blog and considering the potential challenges, you can successfully make the conversion and enjoy the benefits of a normally closed valve, such as improved safety and energy efficiency.
If you're interested in purchasing a duplex valve or need further assistance with valve conversion or any other valve-related issues, please don't hesitate to contact us. Our team of experts is here to help you find the right solution for your specific needs.
References
- Manufacturer's technical documentation for the duplex valve.
- Plumbing and heating system design manuals.