Hey there! If you're looking to install a TRV (Thermostatic Radiator Valve) in your home, you've come to the right place. I'm a supplier of TRV valves, and I'm here to walk you through the tools you'll need for a successful installation. Whether you're a DIY enthusiast or a professional plumber, having the right tools is crucial to getting the job done right.


1. Adjustable Wrench
An adjustable wrench is an absolute must-have for installing a TRV valve. You'll use it to loosen and tighten the nuts and bolts that hold the valve in place. Make sure to get a good-quality adjustable wrench that can handle different sizes of nuts. You'll need to use it to remove the old valve (if there is one) and to install the new TRV valve. It's a simple tool, but it's incredibly useful. You can find adjustable wrenches at any hardware store, and they're not too expensive.
2. Pipe Cutter
If you need to cut the pipes to fit the new TRV valve, a pipe cutter is essential. There are different types of pipe cutters available, such as manual and electric ones. For most home installations, a manual pipe cutter will do the job just fine. It's easy to use - you simply place the cutter around the pipe and tighten it until it cuts through. Just make sure to measure the pipes accurately before cutting to ensure a proper fit. A pipe cutter will give you a clean and precise cut, which is important for a leak-free installation.
3. Thread Seal Tape
Thread seal tape, also known as Teflon tape, is used to create a watertight seal between the threaded connections of the TRV valve and the pipes. You'll need to wrap the tape around the male threads of the pipes before screwing the valve on. This helps prevent leaks and ensures that the valve functions properly. Make sure to wrap the tape in the right direction (clockwise) and apply enough layers to create a good seal. You can find thread seal tape at any hardware store, and it's very affordable.
4. Pipe Wrench
A pipe wrench is another important tool for installing a TRV valve. It's used to grip and turn pipes, especially when you need to tighten or loosen them. Unlike an adjustable wrench, a pipe wrench has serrated jaws that can grip the pipe more securely. This is especially useful when dealing with larger pipes or when you need more torque. Make sure to choose a pipe wrench that's the right size for the pipes you're working with. A pipe wrench can be a bit heavy, but it's a powerful tool that will make your installation much easier.
5. Screwdriver
You'll need a screwdriver to remove and install any screws or bolts that are holding the valve cover or other components in place. Depending on the type of TRV valve you have, you may need a Phillips head or a flathead screwdriver. Make sure to have both types on hand just in case. A screwdriver is a simple but essential tool for any installation job.
6. Level
A level is used to ensure that the TRV valve is installed straight and level. This is important for both the appearance and the functionality of the valve. If the valve is not level, it may not work properly or may look uneven. You can use a small spirit level to check the horizontal and vertical alignment of the valve. Just place the level on top of the valve and adjust it until the bubble is centered. A level is a cheap and easy-to-use tool that will make a big difference in the quality of your installation.
7. Pressure Gauge
A pressure gauge is not always necessary for a basic TRV valve installation, but it can be very useful if you want to check the water pressure in the system. This can help you ensure that the valve is operating under the right conditions and that there are no issues with the plumbing. You can find pressure gauges at most hardware stores, and they're relatively inexpensive. If you're not sure how to use a pressure gauge, you can always consult a professional plumber.
8. Safety Gear
Last but not least, don't forget to wear safety gear when installing a TRV valve. This includes safety glasses to protect your eyes from flying debris, gloves to protect your hands from sharp edges and chemicals, and possibly a dust mask if you're working in a dusty environment. Safety should always be your top priority when doing any kind of DIY project.
Now that you know what tools you need to install a TRV valve, let's talk a bit about the different types of valves available. As a TRV valve supplier, I offer a wide range of valves to suit different needs and budgets.
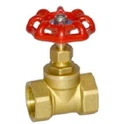
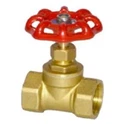
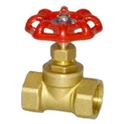
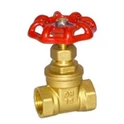
If you're looking for a more basic option, you might consider a Manual Radiator Valve. These valves allow you to manually control the flow of hot water into the radiator, giving you some control over the temperature in the room. They're simple to install and operate, and they're a cost-effective solution for many homes.
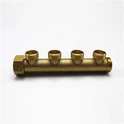
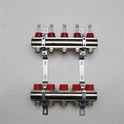
On the other hand, if you want more advanced features and greater control over your heating system, you might want to consider a Duplex Valve. These valves combine the functions of a TRV valve and a manual valve, allowing you to adjust the temperature automatically or manually as needed. They're a great option for larger homes or for those who want more precise control over their heating.
So, there you have it - all the tools you need to install a TRV valve and some information about the different types of valves available. If you're interested in purchasing a TRV valve or have any questions about the installation process, feel free to get in touch. I'm here to help you find the right valve for your needs and ensure a successful installation. Whether you're a homeowner looking to upgrade your heating system or a professional plumber in need of high-quality valves, I've got you covered.
References
- Home Improvement Manuals
- Plumbing Guides from Local Hardware Stores