Testing a heating valve is a crucial process to ensure its proper functionality and efficiency. As a heating valve supplier, I understand the significance of providing high - quality valves that perform optimally. In this blog, I will share detailed steps on how to test a heating valve, covering different types of tests and what to look for during the process.
Pre - Test Preparation
Before starting the testing process, it is essential to gather the necessary tools and materials. You will need a pressure gauge, a thermometer, a multimeter (if the valve is electrically operated), and a set of wrenches. Additionally, ensure that you have a safe and suitable testing environment. The area should be well - ventilated, and all safety precautions should be followed.
Visual Inspection
The first step in testing a heating valve is a visual inspection. Check the valve for any visible signs of damage, such as cracks, dents, or corrosion. Examine the valve body, the connections, and the actuator (if present). A damaged valve may not function correctly and could lead to leaks or inefficient heating. If you notice any significant damage, it is advisable to replace the valve rather than attempting to test it further.
Pressure Testing
Pressure testing is a fundamental test for heating valves. It helps to determine if the valve can withstand the required pressure without leaking.
Step 1: Isolate the Valve
First, isolate the valve from the heating system. Close the isolation valves on both the inlet and outlet sides of the valve being tested. This will prevent any pressure from the main system from interfering with the test.
Step 2: Connect the Pressure Gauge
Connect a pressure gauge to the valve. You can usually find a test port on the valve body for this purpose. Make sure the connection is tight to avoid any leaks during the test.
Step 3: Apply Pressure
Slowly increase the pressure in the valve using a pressure source. For most heating valves, the test pressure should be set according to the manufacturer's specifications. Typically, it is around 1.5 times the normal operating pressure. Monitor the pressure gauge closely as you increase the pressure.
Step 4: Check for Leaks
Once the desired pressure is reached, hold it for a specified period, usually around 10 - 15 minutes. During this time, carefully inspect the valve for any signs of leaks. Check all the connections, the valve body, and the stem. If you detect any leaks, the valve may need to be repaired or replaced.
Flow Testing
Flow testing is another important aspect of testing a heating valve. It ensures that the valve can regulate the flow of hot water or steam through the heating system effectively.
Step 1: Set Up the Flow Testing Equipment
You will need a flow meter to measure the flow rate. Connect the flow meter to the valve in the appropriate position, following the manufacturer's instructions.
Step 2: Open the Valve
Gradually open the valve to its fully open position. Start the heating system to allow the fluid (water or steam) to flow through the valve.
Step 3: Measure the Flow Rate
Use the flow meter to measure the flow rate at different valve openings. Record the flow rate readings at various positions, such as 25%, 50%, 75%, and 100% open. Compare these readings with the valve's specifications. A properly functioning valve should be able to regulate the flow rate accurately according to its design.


Step 4: Evaluate the Flow Characteristics
Analyze the flow characteristics of the valve. The flow rate should increase smoothly as the valve opens wider. If there are sudden jumps or drops in the flow rate, it may indicate a problem with the valve's internal mechanism.
Temperature Testing
Temperature testing is crucial, especially for valves that are designed to control the temperature of the heating system.
Step 1: Install Temperature Sensors
Install temperature sensors at the inlet and outlet of the valve. Make sure the sensors are placed in a position where they can accurately measure the temperature of the fluid.
Step 2: Operate the Valve
Set the valve to a specific temperature setting and start the heating system. Allow the system to reach a stable state.
Step 3: Measure the Temperatures
Use the temperature sensors to measure the inlet and outlet temperatures. Compare the measured temperatures with the set temperature. The valve should be able to maintain the desired temperature within an acceptable tolerance range.
Step 4: Check for Temperature Fluctuations
Monitor the temperatures over a period of time. If there are significant temperature fluctuations, it may indicate a problem with the valve's temperature control mechanism.
Electrical Testing (for Electrically Operated Valves)
If the heating valve is electrically operated, electrical testing is necessary to ensure its proper functioning.
Step 1: Check the Power Supply
Use a multimeter to check if the valve is receiving the correct voltage. Measure the voltage at the valve's electrical terminals. Make sure the voltage is within the specified range for the valve.
Step 2: Test the Actuator
The actuator is the part of the valve that controls its opening and closing. Use the multimeter to test the resistance of the actuator coil. Compare the measured resistance with the manufacturer's specifications. If the resistance is outside the normal range, the actuator may be faulty.
Step 3: Check the Control Signal
If the valve is controlled by a thermostat or a control system, check the control signal. Make sure the signal is being sent correctly to the valve and that the valve responds appropriately to the signal.
Testing Different Types of Heating Valves
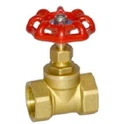
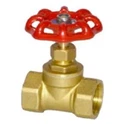
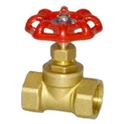
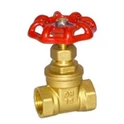
Manual Radiator Valve
A Manual Radiator Valve is a simple type of heating valve that is manually adjusted to control the flow of hot water to a radiator. When testing a manual radiator valve, the visual inspection is crucial. Check the valve handle for smooth operation. For pressure and flow testing, the processes are similar to those described above. However, since it is a manual valve, there is no electrical testing involved.
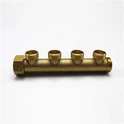
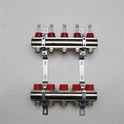
Duplex Valve
A Duplex Valve is often used in more complex heating systems. It usually consists of two valves in parallel, which can be used for backup or for different flow rates. When testing a duplex valve, in addition to the standard pressure, flow, and temperature tests, it is important to check the interaction between the two valves. Make sure that both valves open and close correctly and that the flow is evenly distributed between them.
Conclusion
Testing a heating valve is a comprehensive process that involves multiple steps and types of tests. By following these steps, you can ensure that the heating valves you supply or use in your heating system are functioning properly. A well - tested heating valve will not only provide efficient heating but also reduce the risk of breakdowns and costly repairs.
If you are in the market for high - quality heating valves or need more information on valve testing, I encourage you to contact us for procurement and further discussions. Our team of experts is ready to assist you in finding the right heating valves for your specific needs.
References
- Heating Valve Manufacturer's Manuals
- Industry Standards for Heating System Testing