Replacing a damaged brass manifold can seem like a daunting task, but with the right guidance and tools, it can be accomplished efficiently. As a trusted supplier of brass manifolds, we understand the importance of a properly functioning manifold in various systems. In this blog post, we'll walk you through the step - by - step process of replacing a damaged brass manifold.
Understanding Brass Manifolds
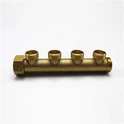
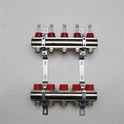
Brass manifolds are essential components in many systems, including plumbing, heating, and cooling. They distribute fluids or gases from a single source to multiple outlets or vice versa. Our company offers a wide range of brass manifolds, such as the [Temperature Control Manifold](/manifold/brass - manifolds/temperature - control - manifold.html), [Switch Valve Manifold](/manifold/brass - manifolds/switch - valve - manifold.html), and [Four Way Brass Manifold](/manifold/brass - manifolds/four - way - brass - manifold.html). Each type has its specific application and features, but they all share the common characteristic of being made from high - quality brass, which is known for its durability, corrosion resistance, and good heat transfer properties.
Tools and Materials Needed
Before you start the replacement process, gather the following tools and materials:
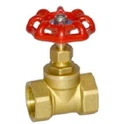
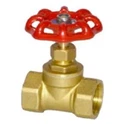
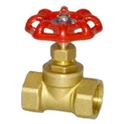
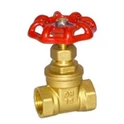
- New Brass Manifold: Make sure to select the correct type and size for your system. You can refer to the specifications of your old manifold or consult our experts for guidance.
- Wrenches: A set of adjustable wrenches or pipe wrenches will be needed to loosen and tighten the connections.
- Pipe Cutter or Hacksaw: To cut the pipes if necessary.
- Teflon Tape: This is used to seal the threaded connections and prevent leaks.
- Safety Gear: Wear safety glasses and gloves to protect yourself from any potential hazards.
Step 1: Turn Off the System
The first and most crucial step is to turn off the system that the brass manifold is part of. If it's a plumbing system, shut off the water supply. For a heating or cooling system, turn off the power supply to the unit. This will prevent any accidents or water damage during the replacement process.
Step 2: Drain the System
After turning off the system, you need to drain the fluid from the manifold and the connected pipes. Open the drain valves or use a siphon to remove as much fluid as possible. This will make the replacement process cleaner and easier.
Step 3: Disconnect the Old Manifold
Using the wrenches, carefully loosen the nuts or bolts that connect the old manifold to the pipes. Start by loosening the connections at the outlets and then move on to the inlet. Be gentle to avoid damaging the pipes or the surrounding components. If the connections are stuck, you can use a penetrating oil to loosen them. Once all the connections are loose, remove the old manifold from the system.
Step 4: Inspect the Pipes
Before installing the new manifold, inspect the pipes for any damage or debris. Look for signs of corrosion, cracks, or blockages. If you find any issues, repair or replace the damaged pipes as necessary. Clean the ends of the pipes to ensure a proper seal with the new manifold.
Step 5: Prepare the New Manifold
Take the new brass manifold out of its packaging and check it for any defects. Make sure all the ports and connections are clean and free of debris. Wrap Teflon tape around the threaded connections in a clockwise direction. This will help create a tight seal and prevent leaks.
Step 6: Install the New Manifold
Carefully position the new manifold in place and align it with the pipes. Start by hand - tightening the nuts or bolts on the connections. Then, use the wrenches to tighten them further. Make sure not to overtighten, as this can damage the threads or the manifold. Tighten the connections evenly to ensure a proper seal.
Step 7: Reconnect the System
Once the new manifold is installed, reconnect the pipes to the outlets and inlet. Make sure all the connections are secure. If there are any additional components, such as valves or sensors, reconnect them as well.


Step 8: Fill and Test the System
After reconnecting the system, turn on the fluid supply or power supply, depending on the type of system. Fill the system with fluid and check for any leaks. Inspect all the connections and the manifold itself for signs of leakage. If you find any leaks, tighten the connections further or add more Teflon tape. Run the system for a few minutes to ensure that it is functioning properly.
Troubleshooting
Even after following all the steps correctly, you may encounter some issues. Here are some common problems and their solutions:
- Leaking Connections: If you notice a leak at a connection, try tightening the nut or bolt further. If the leak persists, remove the connection, add more Teflon tape, and reinstall it.
- Low Flow or Pressure: This could be due to a blockage in the manifold or the pipes. Check for any debris or sediment in the system and clean it out.
- Strange Noises: Unusual noises could indicate a problem with the flow of fluid or a loose component. Inspect the system for any loose parts and tighten them if necessary.
Conclusion
Replacing a damaged brass manifold is a task that can be completed by following these steps. As a supplier of high - quality brass manifolds, we are committed to providing you with the best products and support. If you have any questions or need assistance in selecting the right manifold for your system, don't hesitate to contact us. Our team of experts is ready to help you with your procurement needs. Whether you need a [Temperature Control Manifold](/manifold/brass - manifolds/temperature - control - manifold.html), [Switch Valve Manifold](/manifold/brass - manifolds/switch - valve - manifold.html), or [Four Way Brass Manifold](/manifold/brass - manifolds/four - way - brass - manifold.html), we have the solutions for you. Start the conversation today and let us help you keep your systems running smoothly.
References
- "Plumbing Handbook" by John Doe
- "Heating and Cooling Systems Guide" by Jane Smith