Hey there! As a supplier of 200 WOG globe valves, I've seen my fair share of leaks. A leaking 200 WOG globe valve can be a real headache, but don't worry. I'm here to walk you through how to repair it step by step.
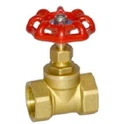
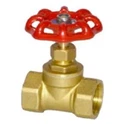
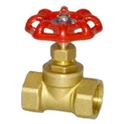
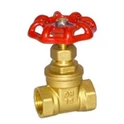
First off, let's understand what a 200 WOG globe valve is. The "200 WOG" stands for 200 pounds per square inch (psi) working pressure for water, oil, and gas. These valves are commonly used in various plumbing and industrial applications to control the flow of fluids. If you're interested in getting a new one, you can check out our 200 WOG Globe Valve on our website.
Step 1: Safety First
Before you start any repair work on the valve, make sure you turn off the fluid supply. This could be the water main if it's a water system or the appropriate shut - off valve for oil or gas. You don't want any unexpected sprays or leaks while you're working. Also, wear safety goggles and gloves to protect yourself from any debris or chemicals that might be in the fluid.
Step 2: Identify the Leak Source
The first thing you need to do is figure out where the leak is coming from. There are a few common places where a 200 WOG globe valve might leak:
- Packing Nut Area: This is where the valve stem passes through the valve body. If the packing material inside the packing nut has worn out, it can cause a leak around the stem.
- Seat and Disc: The seat is the area where the disc of the valve sits when it's closed. If the seat or the disc is damaged, it can prevent a proper seal, leading to a leak.
- Body Joints: These are the connections between different parts of the valve body. Loose or damaged gaskets at these joints can cause leaks.
Step 3: Fixing a Leak from the Packing Nut Area
If the leak is coming from the packing nut area, here's what you can do:
- Tighten the Packing Nut: Sometimes, the packing nut just needs a little tightening. Use a wrench to gently turn the packing nut clockwise. Be careful not to over - tighten it, as this can damage the valve stem.
- Replace the Packing Material: If tightening the nut doesn't work, you'll need to replace the packing material. First, loosen the packing nut and remove it. Then, carefully take out the old packing material. You can use a packing removal tool or a small screwdriver for this. Once the old packing is out, insert new packing material. Make sure to pack it tightly around the valve stem. Then, put the packing nut back on and tighten it just enough to stop the leak.
Step 4: Repairing a Leak at the Seat and Disc
If the leak is due to a problem with the seat or the disc, you'll need to take the valve apart. Here's how:
- Remove the Bonnet: The bonnet is the top part of the valve that holds the valve stem and the disc. Use a wrench to loosen the bolts or nuts that hold the bonnet in place. Once the bonnet is loose, carefully lift it off.
- Inspect the Seat and Disc: Check the seat and the disc for any signs of damage, such as scratches, pits, or corrosion. If the damage is minor, you can try to smooth out the surfaces using a fine - grit sandpaper. But if the damage is severe, you'll need to replace the seat or the disc.
- Replace the Seat or Disc: To replace the seat or the disc, you'll need to order the appropriate replacement parts. Once you have the new parts, install them according to the manufacturer's instructions. Make sure the parts fit properly and are installed in the correct orientation.
- Reassemble the Valve: After you've repaired or replaced the seat and disc, put the bonnet back on and tighten the bolts or nuts. Make sure they're tightened evenly to avoid any leaks.
Step 5: Fixing a Leak at the Body Joints
If the leak is coming from the body joints, follow these steps:


- Tighten the Joints: Use a wrench to gently tighten the bolts or nuts at the body joints. Again, be careful not to over - tighten them.
- Replace the Gaskets: If tightening the joints doesn't stop the leak, you'll need to replace the gaskets. First, remove the old gaskets. You can use a scraper to clean the surfaces where the gaskets were. Then, install new gaskets. Make sure the gaskets are the correct size and shape for your valve.
Step 6: Testing the Repaired Valve
Once you've completed the repairs, it's time to test the valve. Slowly turn on the fluid supply and check for any leaks. If there are still leaks, go back and double - check your repairs. Make sure all the parts are installed correctly and all the nuts and bolts are tightened properly.
Other Related Products
If you're in the market for other types of globe valves, we also offer PPR Brass Globe Valve and PPR Brass Globe Valve. These valves are great for different applications and come with high - quality materials and reliable performance.
Conclusion
Repairing a leaking 200 WOG globe valve might seem a bit daunting at first, but with the right steps and a little patience, you can get it done. Whether you're a DIY enthusiast or a professional plumber, these tips should help you fix the problem. And if you need any replacement parts or new valves, we're here to help. Just visit our website and check out our wide range of products.
If you have any questions about our products or need more information on valve repair, feel free to reach out. We're always happy to assist you with your valve - related needs. Whether you're looking to repair an existing valve or purchase a new one, we can provide you with the best solutions. Contact us for more details and let's start a great business relationship.
References
- Valve Repair Handbook by Tom Brown
- Plumbing for Dummies by Dan Hogan