Hey there! As a supplier of Gas Pipe Fittings, I've seen my fair share of installation challenges, and one of the trickiest ones is installing gas pipe fittings in a wet environment. It's not impossible, but it does require some extra care and attention. In this blog, I'll walk you through the steps to get the job done right.
Understanding the Challenges of Wet Environments
First off, let's talk about why wet environments are a problem when it comes to gas pipe fitting installation. Water can cause corrosion, which weakens the pipes and fittings over time. It can also make it harder to get a good seal, increasing the risk of gas leaks. Plus, working in wet conditions can be dangerous for you, so safety is a big concern.
Tools and Materials You'll Need
Before you start, gather all the tools and materials you'll need. Here's a basic list:
- Pipe cutter: To cut the pipes to the right length.
- Pipe wrench: For tightening the fittings.
- Teflon tape: Helps create a tight seal.
- Pipe joint compound: Another option for sealing.
- Safety gear: Gloves, goggles, and a respirator to protect yourself.
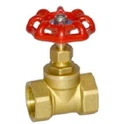
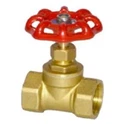
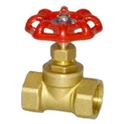
- Galvanized Gas Iron Pipe Fittings: These are more resistant to corrosion, which is crucial in a wet environment.
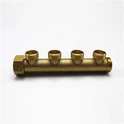
- Gas Pipe Connector: To connect different parts of the gas pipe system.
Preparing the Work Area
Safety first! Make sure the area is well-ventilated to prevent the buildup of gas fumes. If possible, try to dry the area as much as you can. You can use a towel or a wet/dry vacuum to soak up any standing water. If the pipes are wet, dry them thoroughly with a clean cloth.
Measuring and Cutting the Pipes
Measure the pipes carefully to ensure they're the right length. Use a pipe cutter to make clean, straight cuts. After cutting, use a deburring tool to remove any rough edges. This will help the fittings fit properly and create a better seal.


Applying the Sealant
Now it's time to apply the sealant. You can use Teflon tape or pipe joint compound. If you're using Teflon tape, wrap it around the male threads of the pipe in a clockwise direction. Make sure to cover the threads completely but don't overdo it. If you're using pipe joint compound, apply a thin layer to the threads.
Installing the Fittings
Take your Galvanized Gas Iron Pipe Fittings and carefully screw them onto the pipes. Use a pipe wrench to tighten the fittings, but be careful not to over-tighten. Over-tightening can damage the threads and cause leaks.
Checking for Leaks
Once the fittings are installed, it's important to check for leaks. You can use a leak detection solution or a gas detector. Apply the leak detection solution to the joints and look for bubbles. If you see bubbles, there's a leak. Tighten the fitting a little more or reapply the sealant.
Maintaining the Gas Pipe System
After the installation is complete, it's a good idea to check the system regularly for signs of corrosion or leaks. In a wet environment, you may need to do this more often. If you notice any problems, address them right away to prevent further damage.
Conclusion
Installing gas pipe fittings in a wet environment can be a challenge, but with the right tools, materials, and techniques, you can get the job done safely and effectively. Remember to take your time, follow the safety guidelines, and use high-quality materials like our Galvanized Gas Iron Pipe Fittings and Gas Pipe Connector.
If you're in the market for gas pipe fittings, we're here to help. We offer a wide range of high-quality products at competitive prices. Whether you're a professional installer or a DIY enthusiast, we've got the right fittings for your project. Get in touch with us to discuss your needs and start purchasing.
References
- "Gas Pipe Installation Handbook"
- "Safety Guidelines for Working with Gas Pipes"
- Manufacturer's instructions for gas pipe fittings