Hey there! I'm a supplier of brass valve spools, and I know a thing or two about these nifty little components. In this blog, I'm gonna walk you through the process of installing a brass valve spool. Whether you're a DIY enthusiast or a professional plumber, this guide will help you get the job done right.
Why Choose Brass Valve Spools?
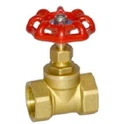
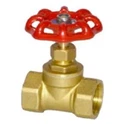
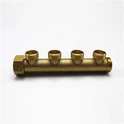
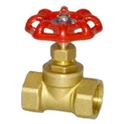
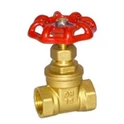
First off, let's talk about why brass valve spools are so popular. Brass is a durable and corrosion - resistant material. It can withstand high pressures and temperatures, making it ideal for various applications, from residential plumbing to industrial settings. And as a supplier, I offer a wide range of brass valve spools, like the High - Quality Brass Spool and the Pickled Brass Spool. These spools are made to last and perform well under different conditions.
Tools You'll Need
Before you start the installation, gather the necessary tools. You'll need a set of wrenches, depending on the size of the valve spool. A pipe cutter might be handy if you need to trim any pipes. A thread sealant, like Teflon tape, is essential to prevent leaks. And don't forget a pair of safety glasses and gloves to protect yourself.
Pre - installation Checks
Once you've got your tools ready, it's time to do some pre - installation checks. First, turn off the water supply. This is super important to avoid any messy leaks during the installation. Then, inspect the valve body where the spool will be installed. Look for any signs of damage, like cracks or corrosion. If you find any issues, it might be a good idea to replace the entire valve or get it repaired before proceeding.
Next, measure the old spool (if you're replacing one) to make sure you've got the right size and type of replacement. Check the thread size and pitch to ensure a proper fit. You don't want to end up with a spool that doesn't match your valve.
Removing the Old Spool
If you're replacing an existing spool, start by using your wrench to loosen the nuts or bolts holding the spool in place. Be careful not to apply too much force, as you don't want to damage the valve body. Once the nuts are loose, gently pull the old spool out. Sometimes, the spool might be stuck due to corrosion or debris. In that case, you can try using a little bit of penetrating oil to loosen it up.
After removing the old spool, clean the valve body thoroughly. Use a wire brush to remove any rust, debris, or old sealant. Make sure the valve body is completely dry before moving on to the next step.
Installing the New Spool
Now it's time to install the new brass valve spool. First, apply a few wraps of Teflon tape to the threads of the spool. Start from the end of the threads and wrap it in a clockwise direction. This will help create a tight seal and prevent leaks.
Carefully insert the spool into the valve body. Make sure it's aligned properly and starts to thread in easily. Don't force it; if it doesn't go in smoothly, double - check the alignment and the thread size. Once the spool is partially threaded in, use your wrench to tighten it. But don't over - tighten, as this can damage the threads or the valve body. A good rule of thumb is to tighten it until it's snug, and then give it a quarter - turn more.
Testing the Installation
After installing the spool, it's time to test the installation. Slowly turn on the water supply and check for any leaks around the spool. If you see any drips, use your wrench to tighten the spool a little more. But be careful not to overtighten. Sometimes, a small drip might stop on its own after a few minutes as the sealant settles.


If there are no leaks, check the operation of the valve. Open and close the valve a few times to make sure the spool is working properly. The valve should open and close smoothly without any sticking or resistance.
Post - installation Maintenance
Once you've successfully installed the spool and tested it, there are a few things you can do for post - installation maintenance. Periodically check the valve for leaks and proper operation. If you notice any issues, like a slow - closing valve or a leak, address them right away.
You can also clean the valve and the spool every once in a while to prevent the buildup of debris and corrosion. A simple wipe - down with a clean cloth and a little bit of mild detergent can go a long way in keeping your valve in good condition.
Conclusion
Installing a brass valve spool isn't too difficult if you follow these steps. Remember to take your time, do the pre - installation checks, and use the right tools. And if you ever need help or have any questions, don't hesitate to reach out. As a brass valve spool supplier, I'm here to assist you. Whether you're looking for a High - Quality Brass Spool or a Pickled Brass Spool, I've got you covered. If you're interested in purchasing our brass valve spools or need more information, feel free to get in touch for a procurement discussion.
References
- Plumbing Handbook: A comprehensive guide to plumbing installations and repairs.
- Manufacturer's instructions for brass valve spools.