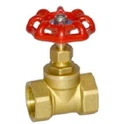
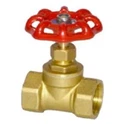
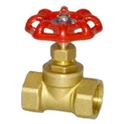
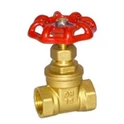
When it comes to industrial valves, the 200 WOG globe valve is a crucial component in many piping systems. As a supplier of 200 WOG Globe Valve, I often receive inquiries about valve maintenance, especially how to replace the packing of a 200 WOG globe valve. In this blog post, I'll share a detailed guide on this process, ensuring that you can carry out the replacement safely and effectively.
Understanding the 200 WOG Globe Valve
Before we dive into the packing replacement process, let's briefly understand what a 200 WOG globe valve is. "WOG" stands for Water, Oil, and Gas, which indicates the type of media the valve can handle. A 200 WOG rating means the valve is designed to withstand a working pressure of 200 pounds per square inch (psi) for water, oil, and gas applications. Globe valves are named for their spherical body shape and are commonly used to regulate the flow of fluid in a pipeline. They offer precise control and are suitable for a wide range of industries, including plumbing, HVAC, and chemical processing.


Why Replace the Packing?
The packing in a globe valve serves as a seal between the valve stem and the valve body, preventing fluid leakage. Over time, the packing can wear out due to factors such as friction, temperature changes, and chemical exposure. When the packing fails, it can lead to leaks, which not only waste resources but also pose safety hazards. Replacing the packing at regular intervals is essential to maintain the valve's performance and ensure the integrity of the piping system.
Tools and Materials Required
- Adjustable wrench
- Packing wrench or gland nut wrench
- Packing material (compatible with the valve and the media)
- Safety glasses
- Gloves
- Cleaning solvent
- Rag
Step-by-Step Guide to Replacing the Packing
Step 1: Prepare the Work Area
Before starting any maintenance work, it's important to shut off the flow of fluid in the pipeline and relieve the pressure. This can be done by closing the upstream and downstream valves and opening a bleed valve to release any trapped pressure. Wear safety glasses and gloves to protect yourself from potential hazards.
Step 2: Remove the Gland Nut
Locate the gland nut on the valve stem. The gland nut is used to compress the packing and create a seal. Use an adjustable wrench or a packing wrench to loosen and remove the gland nut. Be careful not to damage the valve stem or the gland nut during this process.
Step 3: Remove the Old Packing
Once the gland nut is removed, you can access the packing. Use a packing removal tool or a small screwdriver to carefully remove the old packing from the packing gland. Take note of the number of packing rings and their orientation. Clean the packing gland thoroughly with a cleaning solvent and a rag to remove any debris or old packing material.
Step 4: Select the Right Packing Material
Choosing the right packing material is crucial for the proper functioning of the valve. The packing material should be compatible with the valve body material, the media being handled, and the operating conditions. Common packing materials include graphite, PTFE, and asbestos-free fiber. Refer to the valve manufacturer's specifications or consult with a valve expert to select the appropriate packing material.
Step 5: Install the New Packing
Cut the new packing material into rings of the appropriate size. Make sure the rings are slightly larger than the packing gland to ensure a proper fit. Place the packing rings into the packing gland one by one, ensuring that they are evenly spaced and aligned. Use a packing installation tool or a small screwdriver to gently press the packing rings into place. Do not over-tighten the packing at this stage.
Step 6: Reinstall the Gland Nut
Once the new packing is installed, carefully reinstall the gland nut. Use an adjustable wrench or a packing wrench to tighten the gland nut gradually. Tighten the gland nut just enough to compress the packing and create a seal, but avoid over-tightening, as this can damage the packing and the valve stem.
Step 7: Test the Valve
After reinstalling the gland nut, slowly open the upstream valve to allow fluid to flow into the valve. Check for any leaks around the valve stem. If there are no leaks, the packing replacement was successful. If you notice any leaks, slightly tighten the gland nut until the leaks stop.
Tips and Precautions
- Always follow the valve manufacturer's instructions and safety guidelines when performing maintenance work.
- Use the correct tools and equipment to avoid damaging the valve.
- Replace the packing at regular intervals to prevent leaks and ensure the long-term performance of the valve.
- If you are unsure about any step in the packing replacement process, consult with a valve expert or a professional plumber.
Conclusion
Replacing the packing of a 200 WOG globe valve is a relatively simple process that can be done with the right tools and knowledge. By following the steps outlined in this guide, you can ensure that your valve continues to operate safely and efficiently. As a supplier of 200 WOG Globe Valve, I am committed to providing high-quality valves and excellent customer service. If you have any questions or need further assistance with valve maintenance or replacement, please don't hesitate to contact us. We are here to help you find the best solutions for your piping system needs.
In addition to the 200 WOG globe valve, we also offer a wide range of other valve products, including United Brass Globe Valve and PPR Brass Globe Valve. Our valves are made from high-quality materials and are designed to meet the highest industry standards. Whether you are looking for a valve for a small plumbing project or a large industrial application, we have the right solution for you.
If you are interested in purchasing our valves or have any questions about our products, please feel free to contact us. We look forward to working with you and helping you find the best valve solutions for your needs.
References
- Valve Handbook, 4th Edition by Leslie E. Spira
- Industrial Valves: Selection, Specification, and Installation by Anthony M. Palmer