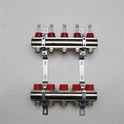
Hey there, folks! If you're into plumbing or just someone who likes to do a bit of DIY around the house, you've probably come across the need to replace a gasket on a Manifold Tail Piece at some point. As a supplier of Manifold Tail Pieces, I've seen my fair share of gasket issues, and I'm here to walk you through the process step by step.
Why Replace the Gasket?
First things first, why would you even need to replace a gasket on a Manifold Tail Piece? Well, gaskets are crucial components that create a tight seal between different parts of the manifold. Over time, they can wear out due to factors like high pressure, temperature changes, or just plain old age. When a gasket fails, it can lead to leaks, which not only waste water but can also cause damage to your plumbing system and surrounding areas. So, replacing a worn-out gasket is essential to keep your manifold working properly.
Tools You'll Need
Before you start the replacement process, you'll need to gather a few tools. Here's a list of what you'll typically need:
- Adjustable wrench
- Screwdriver (flathead or Phillips, depending on your manifold)
- New gasket (make sure it's the right size and type for your Manifold Tail Piece)
- Pipe tape (optional, but it can help create an extra seal)
- Rags or paper towels to clean up any spills
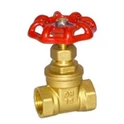
Step 1: Turn Off the Water Supply
The first and most important step is to turn off the water supply to the manifold. This will prevent any water from flowing while you're working on the gasket. Locate the shut-off valve near the manifold and turn it clockwise until it's fully closed. You may also want to open a nearby faucet to relieve any pressure in the pipes.
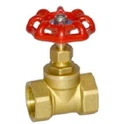
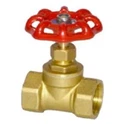
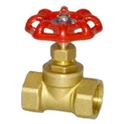
Step 2: Remove the Manifold Tail Piece
Once the water supply is off, you can start removing the Manifold Tail Piece. Use an adjustable wrench to loosen the nuts or bolts that hold the tail piece in place. Be careful not to overtighten or damage the threads. Once the nuts are loose, you should be able to gently pull the tail piece away from the manifold.


Step 3: Remove the Old Gasket
With the Manifold Tail Piece removed, you can now access the old gasket. Use a screwdriver or your fingers to carefully pry the old gasket out of its groove. Be sure to remove all traces of the old gasket material, as any remaining debris can prevent the new gasket from sealing properly.
Step 4: Clean the Surfaces
Before installing the new gasket, it's important to clean the surfaces where the gasket will sit. Use a rag or paper towel to wipe away any dirt, grime, or old gasket material. You can also use a mild cleaning solution if necessary, but make sure to dry the surfaces thoroughly before proceeding.
Step 5: Install the New Gasket
Now it's time to install the new gasket. Carefully place the new gasket into the groove on the Manifold Tail Piece, making sure it fits snugly and evenly. If you're using pipe tape, you can wrap a few layers around the threads of the tail piece before installing it back onto the manifold. This can help create an extra seal and prevent leaks.
Step 6: Reattach the Manifold Tail Piece
Once the new gasket is in place, you can reattach the Manifold Tail Piece to the manifold. Align the holes in the tail piece with the corresponding holes in the manifold and insert the nuts or bolts. Use an adjustable wrench to tighten the nuts or bolts, but be careful not to overtighten. You want the gasket to create a tight seal, but overtightening can damage the gasket or the manifold.
Step 7: Turn On the Water Supply
After the Manifold Tail Piece is securely attached, you can turn on the water supply. Slowly open the shut-off valve and check for any leaks around the gasket. If you notice any leaks, turn off the water supply again and tighten the nuts or bolts slightly. Repeat this process until there are no more leaks.
Tips and Tricks
- Always use the right size and type of gasket for your Manifold Tail Piece. Using the wrong gasket can lead to leaks and other problems.
- If you're having trouble removing the old gasket, you can try using a gasket scraper or a putty knife. Just be careful not to scratch the surfaces where the new gasket will sit.
- When installing the new gasket, make sure it's centered and aligned properly. This will help ensure a tight seal and prevent leaks.
- If you're not comfortable doing the gasket replacement yourself, it's always a good idea to hire a professional plumber. They have the experience and tools to do the job safely and correctly.
Related Manifold Products
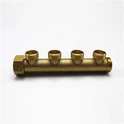
If you're in the market for a new manifold or related products, we offer a wide range of options. Check out our Flowmeter Manifold, Temperature Control Manifold, and Four Way Brass Manifold. These products are made from high-quality materials and are designed to provide reliable performance.
Contact Us for Purchase
If you have any questions about our Manifold Tail Pieces or other products, or if you're interested in making a purchase, feel free to reach out to us. We're here to help you find the right solutions for your plumbing needs.
References
- Plumbing Handbook by John Doe
- DIY Plumbing Guide by Jane Smith