How to Replace a Gas Valve in a Boiler
Introduction
A gas valve is a critical component in a boiler system. It regulates the flow of gas into the boiler, ensuring safe and efficient operation. Over time, gas valves can wear out or malfunction, leading to issues such as inconsistent heating, gas leaks, or even complete boiler failure. As a trusted Gas Valve supplier, I have seen firsthand the importance of a properly functioning gas valve. In this blog post, I will guide you through the process of replacing a gas valve in a boiler, providing you with the necessary steps and precautions to ensure a successful replacement.


Tools and Materials Needed
Before you begin the replacement process, it is important to gather all the necessary tools and materials. Here is a list of what you will need:
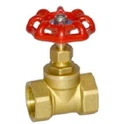
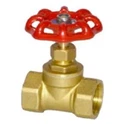
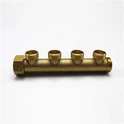
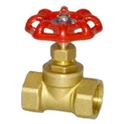
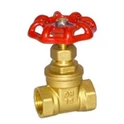
- New gas valve: Make sure to choose the right valve for your boiler. You can explore our range of high - quality gas valves, including Double - Fork Gas Valve, Gas Regulator Valve, and Trident Gas Valve.
- Adjustable wrench
- Pipe wrench
- Screwdriver (flat - head and Phillips)
- Teflon tape
- Safety goggles
- Safety gloves
- Gas leak detector
- Penetrating oil (if necessary)
Safety Precautions
Working with gas is extremely dangerous, so it is crucial to take the following safety precautions before starting the replacement:
- Turn off the power supply to the boiler at the circuit breaker. This will prevent any electrical shocks or unexpected activation of the boiler during the replacement process.
- Shut off the gas supply to the boiler. Locate the gas shut - off valve, which is usually near the boiler, and turn it to the "off" position.
- Ventilate the area thoroughly. Open windows and doors to allow fresh air to circulate, reducing the risk of gas accumulation.
- Wear safety goggles and gloves to protect yourself from any potential hazards, such as sharp edges or gas exposure.
- Have a gas leak detector on hand. This will help you detect any gas leaks during and after the replacement process.
Step - by - Step Replacement Process
Step 1: Access the Gas Valve
First, you need to access the gas valve. This may involve removing a boiler panel or cover. Use a screwdriver to remove any screws holding the panel in place and carefully set it aside.
Step 2: Disconnect the Electrical Wiring
Locate the electrical connections on the gas valve. Use a screwdriver to loosen the terminal screws and gently pull the wires off the valve. Make sure to label the wires so that you can reconnect them correctly later.
Step 3: Disconnect the Gas Pipes
Using an adjustable wrench or pipe wrench, carefully loosen the nuts connecting the gas pipes to the valve. If the nuts are stuck, apply some penetrating oil and let it sit for a few minutes before trying again. Once the nuts are loose, you can remove the gas pipes from the valve.
Step 4: Remove the Old Gas Valve
After disconnecting the electrical wiring and gas pipes, you can now remove the old gas valve. Use a wrench to remove any mounting bolts or brackets holding the valve in place. Carefully lift the old valve out of the boiler.
Step 5: Prepare the New Gas Valve
Before installing the new gas valve, wrap Teflon tape around the pipe threads on the valve. This will create a tight seal and prevent gas leaks. Make sure to wrap the tape in the direction of the threads.
Step 6: Install the New Gas Valve
Place the new gas valve in the same position as the old one and secure it using the mounting bolts or brackets. Tighten the bolts or brackets firmly, but be careful not to overtighten and damage the valve.
Step 7: Reconnect the Gas Pipes
Carefully align the gas pipes with the ports on the new gas valve. Hand - tighten the nuts first, and then use a wrench to give them a final quarter - turn. Do not overtighten the nuts, as this can cause the pipes to crack or the valve to malfunction.
Step 8: Reconnect the Electrical Wiring
Reconnect the electrical wires to the new gas valve according to the labels you made earlier. Tighten the terminal screws to ensure a secure connection.
Step 9: Test for Gas Leaks
Once all the connections are made, turn on the gas supply to the boiler. Use a gas leak detector to check for any leaks around the gas valve and pipe connections. If you detect a leak, immediately turn off the gas supply and check the connections again.
Step 10: Restore Power and Test the Boiler
After confirming that there are no gas leaks, turn on the power supply to the boiler at the circuit breaker. Follow the manufacturer's instructions to start the boiler and test its operation. Make sure the boiler heats up properly and that there are no unusual noises or smells.
Common Issues and Troubleshooting
During the replacement process or after testing the boiler, you may encounter some common issues:
- Gas leak: If you detect a gas leak, check all the connections and make sure they are tight. If the leak persists, turn off the gas supply and contact a professional technician.
- Boiler not starting: This could be due to incorrect electrical connections or a faulty valve. Double - check the wiring and make sure the valve is functioning properly.
- Inconsistent heating: This may indicate a problem with the valve's regulation. Check the valve settings and make sure they are correct.
Conclusion
Replacing a gas valve in a boiler is a complex task that requires careful attention to safety and proper installation procedures. By following the steps outlined in this blog post and taking the necessary precautions, you can successfully replace the gas valve in your boiler. As a Gas Valve supplier, we are committed to providing you with high - quality gas valves and the support you need for your boiler maintenance. If you have any questions or need further assistance with choosing the right gas valve for your boiler, or if you are interested in purchasing our gas valves, please feel free to contact us for procurement and negotiation.
References
- Boiler Installation and Maintenance Manuals
- Gas Valve Manufacturer's Instructions
- Safety Guidelines for Working with Gas Appliances