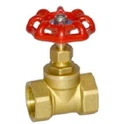
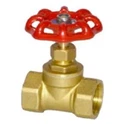
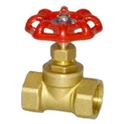
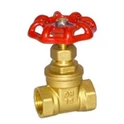
Ensuring the proper alignment of a PPR (Polypropylene Random Copolymer) spherical valve during installation is crucial for its optimal performance, longevity, and the overall efficiency of the plumbing system. As a PPR Spherical Valve supplier, I understand the significance of this process and am here to share some valuable insights on how to achieve proper alignment.
Understanding the Importance of Alignment
Before delving into the installation process, it's essential to understand why proper alignment matters. A misaligned PPR spherical valve can lead to several issues, including leaks, reduced flow rates, premature wear and tear, and even system failures. When the valve is not aligned correctly, it may not seat properly, causing gaps that allow fluid to escape. This not only wastes resources but can also damage surrounding components and structures. Additionally, misalignment can put excessive stress on the valve, leading to cracking or other forms of damage over time.


Pre-Installation Preparation
- Inspect the Valve and Components
- Before installation, carefully inspect the PPR spherical valve and all associated components, such as pipes, fittings, and gaskets. Look for any signs of damage, such as cracks, chips, or deformities. Ensure that the valve's ball and stem are free to move smoothly and that the sealing surfaces are clean and undamaged.
- Check the dimensions of the valve and the pipes to ensure a proper fit. The valve should be compatible with the pipe size and pressure rating of the system.
- Clean the Installation Area
- Thoroughly clean the installation area to remove any dirt, debris, or contaminants. This will help prevent these particles from entering the valve and causing damage or interference. Use a clean cloth or brush to wipe down the pipes and fittings, and rinse them with clean water if necessary.
- Mark the Pipe and Valve
- Use a marker or scribe to mark the position of the valve on the pipe. This will help ensure that the valve is installed in the correct location and orientation. Mark the centerline of the valve and the corresponding position on the pipe to ensure proper alignment.
Installation Process
- Prepare the Pipes
- Cut the pipes to the appropriate length using a sharp pipe cutter or saw. Make sure the cuts are clean and straight, and remove any burrs or rough edges using a file or sandpaper.
- Chamfer the ends of the pipes to facilitate the insertion of the valve and prevent damage to the sealing surfaces. Use a chamfering tool or a file to create a beveled edge on the inside and outside of the pipe ends.
- Apply Adhesive (if required)
- If the PPR pipes are to be joined using adhesive, apply the adhesive to the pipe ends and the valve sockets according to the manufacturer's instructions. Make sure to apply an even coat of adhesive and allow it to dry for the recommended time before assembling the components.
- Insert the Valve into the Pipes
- Carefully insert the valve into the pipes, aligning the marked centerlines. Make sure the valve is fully seated and that there is no gap between the valve and the pipes. Use a gentle twisting motion to ensure a proper fit.
- If the valve has a flange connection, align the flange holes with the corresponding holes in the pipes and insert the bolts. Tighten the bolts evenly using a torque wrench to the recommended torque value.
- Check the Alignment
- Once the valve is installed, use a level or a straightedge to check the alignment of the valve and the pipes. The valve should be perfectly horizontal or vertical, depending on the application. Make any necessary adjustments to ensure proper alignment.
- Check the alignment of the valve's ball and stem. The ball should be centered within the valve body, and the stem should be perpendicular to the valve's axis. Use a caliper or a micrometer to measure the clearance between the ball and the valve body to ensure a proper fit.
- Tighten the Connections
- After checking the alignment, tighten the connections between the valve and the pipes using a wrench or a pliers. Make sure to tighten the connections evenly to prevent leaks. Do not over-tighten the connections, as this can damage the valve or the pipes.
Post-Installation Checks
- Pressure Test the System
- Once the valve is installed and the connections are tightened, pressure test the system to check for leaks. Close all the valves in the system except the one being tested, and gradually increase the pressure to the recommended test pressure. Hold the pressure for the recommended time and check for any signs of leaks, such as drops of water or hissing sounds.
- If a leak is detected, immediately shut off the pressure and locate the source of the leak. Tighten the connections or replace any damaged components as necessary. Repeat the pressure test until no leaks are detected.
- Operate the Valve
- After the pressure test is complete, operate the valve several times to ensure that it opens and closes smoothly. Check the valve's flow rate and pressure drop to ensure that it is functioning properly. If the valve does not operate smoothly or if there are any issues with the flow rate or pressure drop, further investigation may be required.
Additional Tips
- Use Proper Tools
- Always use the proper tools for the installation process. Using the wrong tools can damage the valve or the pipes and make the installation process more difficult. Make sure to use a sharp pipe cutter, a torque wrench, a level, and other appropriate tools.
- Follow the Manufacturer's Instructions
- Always follow the manufacturer's instructions for the installation, operation, and maintenance of the PPR spherical valve. The manufacturer's instructions provide valuable information on the proper installation procedures, torque values, and maintenance requirements.
- Seek Professional Help if Needed
- If you are unsure about the installation process or if you encounter any difficulties, seek professional help. A qualified plumber or technician can provide valuable assistance and ensure that the valve is installed correctly.
Conclusion
Proper alignment of a PPR spherical valve during installation is essential for its optimal performance and the overall efficiency of the plumbing system. By following the steps outlined in this blog, you can ensure that the valve is installed correctly and that it functions properly for years to come.
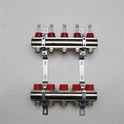
As a PPR Spherical Valve supplier, we offer a wide range of high-quality valves, including Right Angle Ball Valve 1/2", Multi-Function Filter Ball Valve, and Brass Ball Float Valve. Our valves are designed to meet the highest standards of quality and performance, and we are committed to providing our customers with the best products and services.
If you are interested in purchasing our PPR spherical valves or have any questions about the installation process, please feel free to contact us. We will be happy to assist you with your procurement needs and provide you with the information and support you need.
References
- "PPR Pipe Installation Manual," Manufacturer's Guide
- "Plumbing Handbook," Professional Plumbing Association