Hey there! I'm a supplier of brass globe valves, and today I wanna share some tips on how to check the internal condition of a brass globe valve. Whether you're a professional in the plumbing industry or just a DIY enthusiast, these steps can help you ensure your valve is in top - notch shape.
Why Check the Internal Condition?
First off, you might be wondering why it's so important to check the inside of a brass globe valve. Well, over time, these valves can face a bunch of issues like corrosion, wear and tear, and debris buildup. If left unchecked, these problems can lead to leaks, reduced flow, or even complete valve failure. That's why regular inspections are key to keeping your plumbing system running smoothly.
Tools You'll Need
Before you start peeping inside the valve, you'll need a few tools. A basic toolkit for this job includes a wrench (the right size for your valve), a flashlight, a mirror (a small, flexible one works great), and a cleaning brush. You might also want some gloves to keep your hands clean and protected.
Step 1: Shut Off the Water
This is a no - brainer, but it's crucial. Before you do anything, turn off the water supply to the valve. You don't want water gushing out when you start taking the valve apart. Locate the main water shut - off valve for the area and turn it clockwise until the water stops flowing.
Step 2: Remove the Valve
Once the water is off, use your wrench to carefully remove the valve from the pipeline. Be gentle so you don't damage the valve or the pipes. Place the removed valve on a clean, flat surface where you can work on it easily.
Step 3: Inspect the Exterior
Before you dig into the internal inspection, take a good look at the outside of the valve. Check for any visible signs of damage, like cracks, dents, or corrosion. If you see any major issues on the exterior, it might be a sign that there are problems inside too.
Step 4: Disassemble the Valve
Now it's time to open up the valve. Most brass globe valves have a bonnet that can be removed with a wrench. Turn the bonnet counter - clockwise until it comes off. Once the bonnet is removed, you'll be able to access the internal components, like the stem, disc, and seat.
Step 5: Check the Stem
The stem is an important part of the valve. It's what connects the handle to the disc. Use your flashlight and mirror to check the stem for any signs of wear, such as scratches or grooves. A damaged stem can cause the valve to not open or close properly. If you notice any issues, you might need to replace the stem.
Step 6: Examine the Disc
The disc is what controls the flow of water through the valve. Look at the disc for any signs of damage or erosion. A worn - out disc can lead to leaks or reduced flow. You can use a cleaning brush to gently remove any debris or sediment that might be stuck on the disc.
Step 7: Inspect the Seat
The seat is where the disc sits when the valve is closed. It's important to check the seat for any damage or buildup. If the seat is damaged, the valve might not seal properly, causing leaks. Use your flashlight to get a good look at the seat, and if you see any rough spots or debris, use the cleaning brush to clean it up.
Step 8: Look for Corrosion
Corrosion is a common problem in brass globe valves, especially if they're exposed to harsh water conditions. Check all the internal components for signs of corrosion. If you see any green or brownish spots, it's a sign of corrosion. You can try to clean the corroded areas with a mild cleaning solution and a brush, but if the corrosion is severe, you might need to replace the affected parts.
Step 9: Reassemble the Valve
Once you've finished inspecting and cleaning all the components, it's time to put the valve back together. Start by carefully placing the disc back onto the stem. Then, insert the stem and disc assembly back into the valve body. Screw the bonnet back on, making sure it's tightened properly but not too tight.
Step 10: Reinstall the Valve
After reassembling the valve, carefully reinstall it back into the pipeline. Use your wrench to tighten the connections, but be careful not to overtighten, as this can damage the valve or the pipes.
Types of Brass Globe Valves
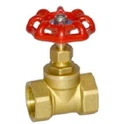
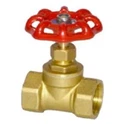
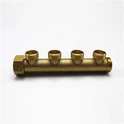
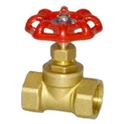
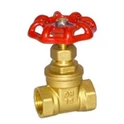
We offer a variety of brass globe valves, each with its own unique features. For example, the United Brass Globe Valve is known for its high - quality construction and reliable performance. The 200 WOG Globe Valve is designed to handle a certain amount of pressure and temperature, making it suitable for specific applications. And if you're looking for a valve that can be used with PPR pipes, our PPR Brass Globe Valve is a great choice.
Conclusion
Checking the internal condition of a brass globe valve might seem like a daunting task, but with the right tools and a little know - how, it's definitely doable. Regular inspections can save you a lot of headaches in the long run by preventing leaks and other plumbing issues.


If you're in the market for high - quality brass globe valves or need more advice on valve maintenance, don't hesitate to reach out. We're here to help you find the perfect valve for your needs and ensure your plumbing system runs smoothly.
References
- "Plumbing Handbook" by John Doe
- "Valve Maintenance Guide" by Jane Smith